When working in Microsoft Dynamics AX have you ever found yourself reusing or copy/pasting the same code to create the same lookup over and over to custom forms and/or report parameters? Have you ever been asked if you could modify the lookup form to allow for filtering? If the answer is yes, then you may be interested in creating a default lookup form with filter in Dynamics AX.
The standard lookup forms are usually nothing more than a grid. However, you can get as creative as you want with them to allow for fact showing when a record is selected or whatever else you can imagine that you would want to see on your lookup form. (A great example of a very functional and informative standard AX lookup form is the HCMWorkerLookup form.)
The following is a simple example of how to create a lookup form with the option to filter with prepopulated combo box values.
Create Extended Data Type
- Create a new EDT type of string.
- Name: DinosaurName
- StringSize: 20
![Project Default Lookup]()
Create Enum
- Create a new base enum
- Name: DinosaurMealPlan
- Add 3 new elements
- Name: All
- Name: Herbivore
- Name: Carnivore
![Project Default Lookup Examples]()
Create table and fields
- Create new table
- Name: Dinosaurs
- Add 2 new fields
- Create Field type of type string
- Name: DinosaurName
- EDT : DinosaurName
2. Create field of type enum
- Name: DinosaurName
- EnumType : DinosaurName
![Project Default Lookup Examples]()
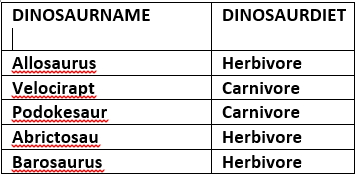
Add data to table
We need some data to play with so insert the following values into the newly created Dinosaurs table.
![Table]()
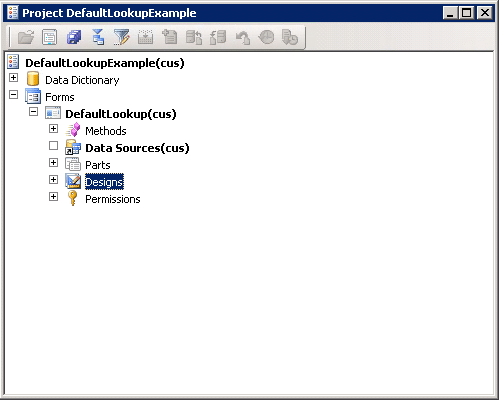
Create a Form
The first thing you need to do is to create a basic form.
![Project Default Lookup Designs]()
Set form design properties
Now we need to set the design properties on the form so it behaves like a standard lookup. The following design properties need to be change.
- Frame: Border
- AlwayOnTop: Yes
- HideToolbar: Yes
- Style: Lookup
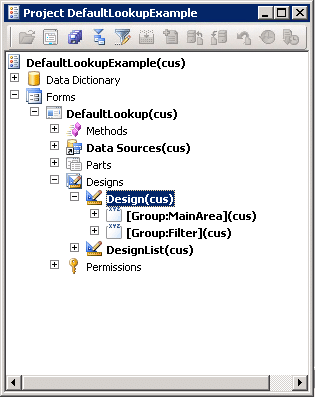
Add form groups
We want our grid to be separated from the drop down we will use the fileter the data. So we need to add two groups.
- Group will contain a grid
2. Group will contain our combo box
- Name: Filter
- Top: Top edge (this will allow our combo box to be displayed on the top left of the form)
![Project Default Lookup Design]()
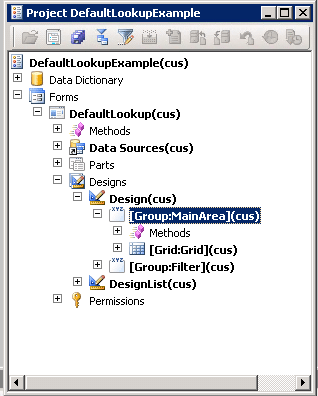
Add a Grid to design
- Add grid to our group “MainArea”
![Project Default Lookup Examples]()
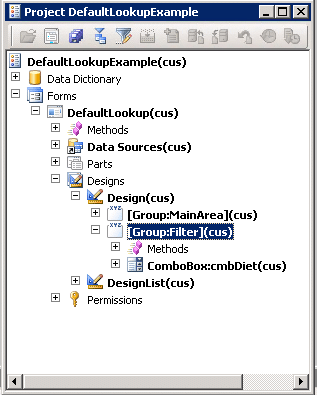
Add a combo box to design
- Add combo box to our group “Filter”
- Name: cmbDiet
- AutoDeclaration: Yes
- EnumType: DinosaurMealPlan
![Project Default Lookup Group Filter]()
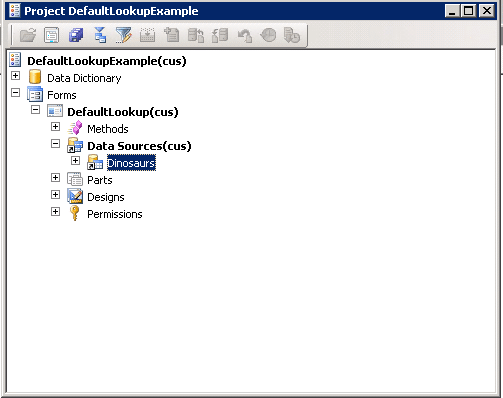
Add form Data Source(s)
Drag the Dinosaurs table we created earlier to the data sources object on the form.
![Project Default Lookup Example]()
Set form Data Source(s) Properties
The data source(s) properties need to be update as listed below.
- AllowEdit: No
- AllowCreate: No
- AllowDelete: No
- InsertAtEnd: No
- InsertIfEmpty: No
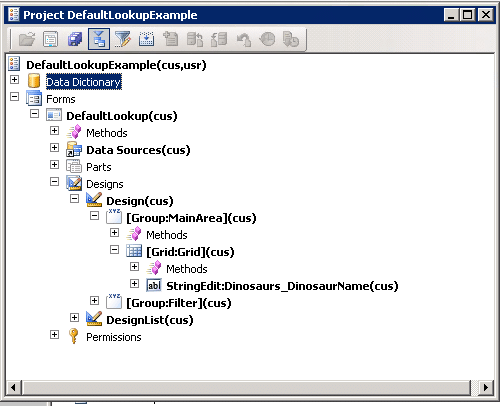
Add data source field to form grid
Now that we have our data source added let add one of its fields to our grid.
- Drag the filed DinosaurName to the grid on the form
- Update properties on newly add grid control
![Project Default Lookup Data Dictionary]()
Modify Form Methods
Now we need to modify the forms methods to give the functionality of a lookup form.
Init method
Now we need to override the forms init() to tell the form which control will be used as the selected value.
public void init()
{
    super();

    // Returns selected value from form control
    element.selectMode(Dinosaurs_DinosaurName);
}
Run method
We want to override the forms run() to allow filter to behave properly in the AX environment
public void run()
{
    // Allow filtering to work properly in a custom lookup form
    boolean filterLookup;
    FormStringControl callingControl = SysTableLookup::getCallerStringControl(element.args());

    filterLookup = SysTableLookup::FilterLookupPreRun(callingControl, Dinosaurs_DinosaurName, Dinosaurs_ds);

    super();

    SysTableLookup::FilterLookupPostRun(filterLookup, callingControl.text(), Dinosaurs_DinosaurName, Dinosaurs_ds);
}
Create form method
We will create a new method called updateQuery() to handle changes to our data sources query when the filter criteria changes in our combo box.
/// <summary>
/// Updates query based on forms combobox selection
/// </summary>
/// <returns>
///  Updated query
/// </returns>
/// <remarks>
///  2016-07-25 Lookup form example
/// </remarks>
public Query updateQuery()
{
    Query query;
    QueryBuildRange qbrDinosaurDiet;
    QueryBuildDataSource    qbdsDinosaur;

    // Get current query of data source
    query = Dinosaurs_ds.query();

    // Get the data source that we need to adjust the range
    qbdsDinosaur  = query.dataSourceName('Dinosaurs');

    // Checks if there is an existing range
    qbrDinosaurDiet  = qbdsDinosaur.findRange(fieldNum(Dinosaurs, DinosaurDiet));

    // If range does not exist we need to add a range
    if(qbrDinosaurDiet == null)
    {
        qbrDinosaurDiet  = qbdsDinosaur.addRange(fieldNum(Dinosaurs, DinosaurDiet));
    }

    // Selection of combo box will determine values for ranges
    switch(cmbDiet.selection())
    {
        case DinosaurMealPlan::Carnivore:
            qbrDinosaurDiet.value(SysQuery::value(DinosaurMealPlan::Carnivore));
            break;

        case DinosaurMealPlan::Herbivore:
            qbrDinosaurDiet.value(SysQuery::value(DinosaurMealPlan::Herbivore));
            break;

        default:
            qbrDinosaurDiet.value(SysQuery::valueUnlimited());
            break;
    }

    return query;
}
Modify data source method
We will override the Dinosaurs data source method executeQuery() to allow for our updates to the querys data sources ranges.
This will utilize the updateQuery() that we created in the form.
public void executeQuery()
{
    // update the datasources query
    this.query(element.updateQuery());

    super();
}
Modify Form Control methods
We need to override the method selectionChange() on the combo box with the following code.
Whenever a user changes their selection in the combo box it will update our query and thus change the look form to reflect their selection.
public int selectionChange()
{
    int ret;

    ret = super();

    // Executes data sources query which will filter our combo box
    Dinosaurs_ds.executeQuery();

    return ret;
}
Add as default lookup from for Extended Data Type ( EDT )
Ok, so now we are at the whole reason I started this article. I initially was not aware that you could assign a created lookup form to an EDT. Wow? Who cares, right? We should care because this allows us to better follow the DRY (Don’t repeat yourself) principle. Which of course helps with maintainability and reusability.
This comes in really handy when you are doing data contract classes for reports. Especially if you are doing a lot of custom reports that are using the same EDT as a parameter. This allows you to reuse the lookup form without much extra code if any. Also if you don’t require any further complexity to the report parameters, then it also saves you from having to create a UIBuilder class to allow lookups for the parameters.
To set the lookup form as your lookup for the EDT set the following property on the selected EDT.
Call form from a lookup event
You can also call this from if you are overriding a lookup method on a form.
Below is an example of how you can accomplish this.
public void lookup()
{
    // Overrides a lookup method to utilize the default lookup form
    FormRun lookup;
    Args args = new Args(formStr(DefaultLookup));

    args.parm("");
    args.caller(this);
    lookup = classFactory.formRunClass(args);
    lookup.init();
    this.performFormLookup(lookup);
}
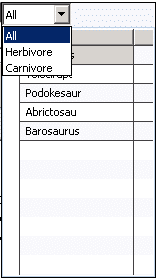
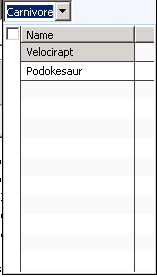
Now go implement the lookup form that was created and it should look like the images below.
Filter choices
![Filter Choices]()
Carnivore filter selected
![Filter selected]()
And there you have your lookup form with filter in Dynamics AX.